Laminating Eyelashes At Home? Yes, It Is Possible. Meet Nanolash Lash Lift Kit!
Girls! It’s time for a revolution!
Today, I would like to introduce you to a kit for laminating eyelashes at home – Nanolash Lash Lift Kit. I have tested it myself and I want to share objective observations with you. I know that many of you are also looking for a solution to your eyelash problems. Perhaps, this is what can help you transform the appearance of your eyelashes for good.

Nanolash Lash Lift Kit for at-home lash lamination – what can I say about it?
I chose Nanolash Lash Lift Kit because I had heard a lot of good things about this brand. I decided that it was time to give it a chance and finally test the brand’s products.
I’ll honestly admit that I was also tempted by the positive reviews from women I found online. The lash lift and lamination kit from Nanolash seemed to be the perfect product that could not only rebuild my eyelashes but make them significantly longer.
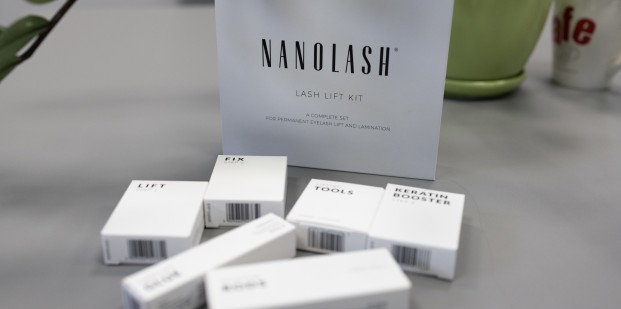
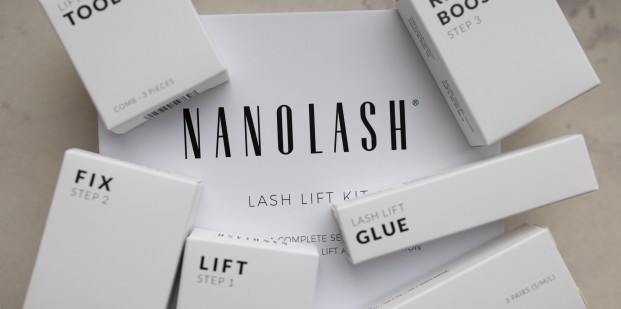
What’s more, Nanolash Lash Lift Kit is truly complete. In the package, I found:
- 3 lash-laminating formulas – 10 sachets of 0.5 milliliters each;
- Lash Lift Glue – 5 milliliters;
- 3 pairs of silicone rods in 3 different sizes;
- other accessories for performing lash lamination at home.
I noticed that due to the number of sachets, I can perform up to 10 eyelash lifts in my house. Economical solutions like that always convince me. The products’ formulas were also an added advantage. The formulas are based on natural ingredients like Abyssinian oil and avocado oil. They are responsible for rebuilding and regenerating the eyelashes.
Immediately after receiving the package, I set about testing the product. Check out how my at-home eyelash lamination went and what my impressions were.

My first DIY lash lift – how did I do and what were the results?
I started testing the Nanolash Lash Lift Kit by carefully reading the instructions. Since I hadn’t done this before, I didn’t know where to start. Fortunately, the producer made sure to explain everything in detail. I started with:
- washing off the mascara and cleaning the lashes thoroughly;
- carefully separating the top and bottom lashes;
- attaching the silicone rods as close to the lash line as possible.
I worked on each eye separately. However, if you have a friend who will help you with the application, you can perform this treatment simultaneously on both eyelids.
Next, I started applying the products. I followed exactly the order indicated on the packaging. I gently combed my eyelashes upward until they stuck to the rod. Then, I left each product on the lashes for about 8 minutes (the manufacturer indicates 7-10 minutes). After this time, I washed off the product and applied another the next one. I repeated the whole process with the other products.

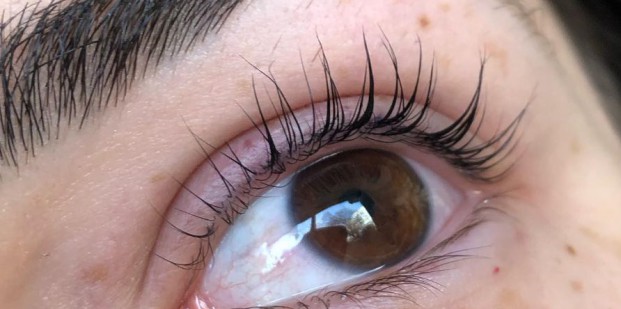
The effects were phenomenal, and I say this with a clear conscience. My lashes, straight after the treatment, were beautifully separated, long, thick, and curled. I can’t hide the fact that there was also a visible improvement in their condition. They were visibly moisturized and soft to the touch. I think that’s why they became more prone to styling. As for durability, in my case, the lash laminating effects lasted for about 9 weeks. This is even more than the maker indicated. However, I admit that I took maximum care of my lashes during this period and did not stress them with unnecessary products.
The eyelash lift kit from Nanolash – my conclusions
If I want to summarize Nanolash Lash Lift Kit in any way, I can only say -WOW! It’s rare for me to be so optimistic about a product, but this one met my expectations 100%.
My lashes looked revived, and I was able to give them the desired shape and length. The effects were also long-lasting, and you should know that one eyelash lamination kit allows for as many as 10 treatments. I can’t hide the fact that it was a pleasure too so I can wholeheartedly recommend Nanolash Lash Lift Kit to all of you. Try at-home eyelash lamination and see how easy it is!


